Sharing something which I did today to kill time. I configured cert mode communication with OAM 11gR2. Although, you will find the same steps in oracle documentation but this blog is intended only to share/record my experience and is not intended to replace the oracle documentation in any case:
Environment Details:
OAM 11g R2, Admin Server: 7001, OAM Server: 14100
1. Installed openssl (openssl-1.0.0e.tar.gz) to create my own Certificate Authority (CA) and create self signed certificate as this what oracle recommends to use for configuring CERT mode.
Here is the link from where i downloaded the openssl from http://www.openssl.org/source/
2. Create your own CA Authority
Please refer the below link on how to create your own Certificate Authority:
http://datacenteroverlords.com/2012/03/01/creating-your-own-ssl-certificate-authority/
3. Generating a Certificate Request and Private Key
oracle@oam custom]$ openssl req -new -keyout aaa_key.pem -out aaa_req.pem -utf8
This creates two files - aaa_key.pem and aaa_req.pem.
The certificate request for Webgate generates the request file aaa_req.pem, which you must send to a root CA that is trusted by the OAM Sever. Now, submit the certificate request (aaa_req.pem) to a trusted CA to get signed certificate i.e., aaa_cert.pem.
Use the below command to sign the certificate request:
openssl x509 -req -in aaa_req.pem -CA aaa_chain.pem -CAkey rootCA.key -CAcreateserial -out aaa_cert.pem -days 500
This will generated the signed certificate named aaa_cert.pem in base64 (PEM) format.
openssl x509 -in aaa_cert.pem -inform PEM -out aaa_cert.der -outform DER
4. Retrieving the OAM Keystore Alias and Password
cd $ORACLE_IDM/common/bin/
Start the WebLogic Scripting Tool:
Note: Here, OAM_STORE represents the name of your OAM Keystore.
Already in Domain Runtime Tree
5. Importing the Trusted, Signed Certificate Chain Into the OAM Keystore
Note: The keystores associated with Oracle Access Manager 11g accepts only PKCS8 DER format certificates:
Unzip importcert.zip and locate the Readme file in the following location:
cd $ORACLE_IDM/oam/server/tools
[oracle@oam custom]$ keytool -importcert -file aaa_chain.pem -trustcacerts -storepass 4h94npscjjrbtl7ql375fjiju -storetype JCEKS -keystore /app/u01/middleware/user_projects/domains/idm_domain/config/fmwconfig/.oamkeystore
Owner: CN=OAM.EXAMPLE.COM, OU=OAM, O=MYCOMPANY, L=Torrance, ST=CA, C=US
[oracle@oam custom]$ openssl x509 -in aaa_cert.pem -inform PEM -out aaa_cert.der -outform DER
The above command will convert the signed certificate (aaa_cert.pem) to DER format i.e., aaa_cert.der
Convert the aaa_key.pem to DER format
[oracle@oam custom]$ openssl pkcs8 -topk8 -nocrypt -in aaa_key.pem -inform PEM -out aaa_key.der -outform DER
Enter pass phrase for aaa_key.pem: Oracle123
The above command will convert the private key (aaa_key.pem) to DER format i.e., aaa_key.der
6. Import the aaa_key.der and the aaa_cert.der format certificates into the .oamkeystore using Oracle supplied importcert.jar file
[oracle@oam importcert]$ java -cp importcert.jar oracle.security.am.common.tools.importcerts.CertificateImport -keystore /app/u01/middleware/user_projects/domains/idm_domain/config/fmwconfig/.oamkeystore -privatekeyfile ~/Downloads/openssl-1.0.0e/custom/aaa_key.der -signedcertfile ~/Downloads/openssl-1.0.0e/custom/aaa_cert.der -alias my.certmode -storetype JCEKS
Enter Keystore password : 4h94npscjjrbtl7ql375fjiju
7. Adding Certificate Details to Access Manager Settings
After importing the certificates into the keystore, you must add the alias and password that you specified earlier into Access Manager settings configuration in Oracle Access Manager Console. To add certificate details to Access Manager Settings:
1. From the Oracle Access Manager Console, click the System Configuration tab.

8. Setting the OAM_server mode to cert
Open the OAM Server registration page, Server instances,oam-server1. Select the Proxy tab, change the Proxy mode to Cert, and click Apply.

9. Generating a Private Key and Certificate Request for the WebGate
Use the following procedure to retrieve the private key, certificate, and CA certificate for the Webgate
1. Generate both the certificate request (aaa_req.pem) and Private Key (aaa_key.pem) as follows:
[oracle@oam webgate]$ openssl req -new -keyout aaa_key.pem -out aaa_req.pem -utf8
Generating a 2048 bit RSA private key
This will generate the files, aaa_key.pem and aaa_req.pem
Submit the certificate request (aaa_req.pem) to a trusted CA.
[oracle@oam webgate]$ openssl x509 -req -in aaa_req.pem -CA ../aaa_chain.pem -CAkey ../rootCA.key -CAcreateserial -out aaa_cert.pem -days 500
Encrypt the private key (aaa_key.pem) using a password as follows:
[oracle@oam webgate]$ openssl rsa -in aaa_key.pem -passin pass:Oracle123 -out aaa_key.pem -passout pass:Oracle123 -des
10. Update the communication mode in the WebGate Agent registration in the OAm admin console
From the System Configuration tab, Access Manager Settings section, expand the SSO Agents node, and expand OAM Agents.

11. Copy the updated WebGate files/Artifacts to the proper WebGate location
[oracle@oam config]$ pwd
12. Copy the WebGate certificate files (.PEM) to the proper WebGate location
[oracle@oam config]$ pwd
13. Verifying Cert Mode Configuration


Issue Encountered:
while doing this configuration first time, I used the same certificate in step #3 & #9 and got different kind of errors/warnings like:
Could not read file oblog_config.xml
OBWebGate_AuthnAndAuthz: Oracle AccessGate API is not initialized.
So, second time, I configured the simple mode first to see if that works or not. After successfully configuring OAM in SIMPLE mode (found that so easy to configure) , I updated the configuration to CERT mode using different certificates in step3 & step9 though I kept the information in both certificate request as same and it worked like charm.
References:
Environment Details:
OAM 11g R2, Admin Server: 7001, OAM Server: 14100
OAM 11g WebGate
OUD as user store
OHS running on 7778 port
java version "1.6.0_24"
OEL 6.3
WLS 10.3.6.0 WLS_DOMAIN=/app/u01/middleware/user_projects/idm_domain
ORACLE_INSTANCE_NAME=instance5 /app/u01/middleware/Oracle_WT1/instances/instance5
OHS_COMPONENT=ohstest
OAMAGENT= webgate5
Here is the link from where i downloaded the openssl from http://www.openssl.org/source/
2. Create your own CA Authority
Please refer the below link on how to create your own Certificate Authority:
http://datacenteroverlords.com/2012/03/01/creating-your-own-ssl-certificate-authority/
3. Generating a Certificate Request and Private Key
oracle@oam custom]$ openssl req -new -keyout aaa_key.pem -out aaa_req.pem -utf8
Generating a 2048 bit RSA private key
................+++
..........................+++
writing new private key to 'aaa_key.pem'
Enter PEM pass phrase: Oracle123
Verifying - Enter PEM pass phrase: Oracle123
-----
You are about to be asked to enter information that will be incorporated into your certificate request.
What you are about to enter is what is called a Distinguished Name or a DN.
There are quite a few fields but you can leave some blank
For some fields there will be a default value,
If you enter '.', the field will be left blank.
-----
Country Name (2 letter code) [XX]:US
State or Province Name (full name) []:NC
Locality Name (eg, city) [Default City]:Charlotte
Organization Name (eg, company) [Default Company Ltd]:MYEXAMPLE
Organizational Unit Name (eg, section) []:OAM
Common Name (eg, your name or your server's hostname) []:OAM.EXAMPLE.COM
Email Address []:
Please enter the following 'extra' attributes
to be sent with your certificate request
A challenge password []:Oracle123
An optional company name []:MYEXAMPLE
This creates two files - aaa_key.pem and aaa_req.pem.
The certificate request for Webgate generates the request file aaa_req.pem, which you must send to a root CA that is trusted by the OAM Sever. Now, submit the certificate request (aaa_req.pem) to a trusted CA to get signed certificate i.e., aaa_cert.pem.
Use the below command to sign the certificate request:
openssl x509 -req -in aaa_req.pem -CA aaa_chain.pem -CAkey rootCA.key -CAcreateserial -out aaa_cert.pem -days 500
Signature ok
subject=/C=US/ST=NC/L=Charlotte/O=MYEXAMPLE/OU=OAM/CN=OAM.EXAMPLE.COM
Getting CA Private Key
This will generated the signed certificate named aaa_cert.pem in base64 (PEM) format.
Note: The aaa_chain.pem and rootCA.key are generated during the setup of Certificate Authority.
You can run the above command again to generate the aaa_cert.der file or you can run the below command to convert .PEM to .DER format:openssl x509 -in aaa_cert.pem -inform PEM -out aaa_cert.der -outform DER
4. Retrieving the OAM Keystore Alias and Password
cd $ORACLE_IDM/common/bin/
Start the WebLogic Scripting Tool:
./ wlst.sh
1. In the WLST shell, enter the command to connect and then enter the requested information. For example:
2. wls:/offline> connect()
3. Please enter your username [weblogic] : weblogic
4. Please enter your password [welcome1] : Oracle123
5. Please enter your server URL [t3://localhost:7001] : t3://oam.example.com:7001
wls:/base_domain/serverConfig>
wls:/idm_domain/serverConfig> domainRuntime()
Location changed to domainRuntime tree. This is a read-only tree with DomainMBean as the root.
For more help, use help(domainRuntime)
wls:/idm_domain/domainRuntime> listCred(map="OAM_STORE",key="jks")
Note: Here, OAM_STORE represents the name of your OAM Keystore.
Already in Domain Runtime Tree
[Name : jks, Description : null, expiry Date : null]
PASSWORD:4h94npscjjrbtl7ql375fjiju
wls:/idm_domain/domainRuntime>
Note: Pay close attention to the password of the OAM Keystore that is displayed because this is required to import the certificates.
5. Importing the Trusted, Signed Certificate Chain Into the OAM Keystore
Note: The keystores associated with Oracle Access Manager 11g accepts only PKCS8 DER format certificates:
Unzip importcert.zip and locate the Readme file in the following location:
cd $ORACLE_IDM/oam/server/tools
unzip importcert.zip
Import the trusted certificate chain using the following command:
Note: When prompted to trust this certificate, type yes.
Note: When prompted to trust this certificate, type yes.
[oracle@oam custom]$ keytool -importcert -file aaa_chain.pem -trustcacerts -storepass 4h94npscjjrbtl7ql375fjiju -storetype JCEKS -keystore /app/u01/middleware/user_projects/domains/idm_domain/config/fmwconfig/.oamkeystore
Owner: CN=OAM.EXAMPLE.COM, OU=OAM, O=MYCOMPANY, L=Torrance, ST=CA, C=US
Issuer: CN=OAM.EXAMPLE.COM, OU=OAM, O=MYCOMPANY, L=Torrance, ST=CA, C=US
Serial number: a719d32a4d962e18
Valid from: Mon Mar 24 21:27:15 CDT 2014 until: Wed Jan 11 20:27:15 CST 2017
Certificate fingerprints:
MD5: 28:CD:C6:36:7A:B3:37:C9:8F:90:63:AD:2C:2D:09:CF
SHA1: 68:88:B0:D2:10:43:86:73:32:1D:AC:6A:86:2B:15:CF:75:A0:72:95
Signature algorithm name: SHA1withRSA
Version: 3
Extensions:
#1: ObjectId: 2.5.29.14 Criticality=false
SubjectKeyIdentifier [
KeyIdentifier [
0000: BC F0 37 1F 6A 4D C6 05 04 BE 10 3B 7C A2 0B D9 ..7.jM.....;....
0010: D5 84 F4 E6 ....
]]
#2: ObjectId: 2.5.29.19 Criticality=false
BasicConstraints:[
CA:true
PathLen:2147483647
]
#3: ObjectId: 2.5.29.35 Criticality=false
AuthorityKeyIdentifier [
KeyIdentifier [
0000: BC F0 37 1F 6A 4D C6 05 04 BE 10 3B 7C A2 0B D9 ..7.jM.....;....
0010: D5 84 F4 E6 ....
]]
Trust this certificate? [no]: yes
Certificate was added to keystore.
Convert the aaa_cert.pem to DER format
[oracle@oam custom]$ openssl x509 -in aaa_cert.pem -inform PEM -out aaa_cert.der -outform DER
The above command will convert the signed certificate (aaa_cert.pem) to DER format i.e., aaa_cert.der
Convert the aaa_key.pem to DER format
[oracle@oam custom]$ openssl pkcs8 -topk8 -nocrypt -in aaa_key.pem -inform PEM -out aaa_key.der -outform DER
Enter pass phrase for aaa_key.pem: Oracle123
The above command will convert the private key (aaa_key.pem) to DER format i.e., aaa_key.der
6. Import the aaa_key.der and the aaa_cert.der format certificates into the .oamkeystore using Oracle supplied importcert.jar file
[oracle@oam importcert]$ java -cp importcert.jar oracle.security.am.common.tools.importcerts.CertificateImport -keystore /app/u01/middleware/user_projects/domains/idm_domain/config/fmwconfig/.oamkeystore -privatekeyfile ~/Downloads/openssl-1.0.0e/custom/aaa_key.der -signedcertfile ~/Downloads/openssl-1.0.0e/custom/aaa_cert.der -alias my.certmode -storetype JCEKS
Enter Keystore password : 4h94npscjjrbtl7ql375fjiju
Enter Alias password : Oracle123
Certificates imported to keystore
7. Adding Certificate Details to Access Manager Settings
After importing the certificates into the keystore, you must add the alias and password that you specified earlier into Access Manager settings configuration in Oracle Access Manager Console. To add certificate details to Access Manager Settings:
1. From the Oracle Access Manager Console, click the System Configuration tab.
2. From the System Configuration tab, Access Manager Settings section, open the Access Manager Settings page.
3. Expand the Access Protocol section of the page, if needed.
4. Fill in the alias and alias password details acquired in the previous procedure. For example:
Cert Mode Configuration
PEM keystore Alias: my.certmode
PEM keystore Alias Password: Oracle123
8. Setting the OAM_server mode to cert
Open the OAM Server registration page, Server instances,oam-server1. Select the Proxy tab, change the Proxy mode to Cert, and click Apply.
9. Generating a Private Key and Certificate Request for the WebGate
Use the following procedure to retrieve the private key, certificate, and CA certificate for the Webgate
1. Generate both the certificate request (aaa_req.pem) and Private Key (aaa_key.pem) as follows:
[oracle@oam webgate]$ openssl req -new -keyout aaa_key.pem -out aaa_req.pem -utf8
Generating a 2048 bit RSA private key
.....................................................................................................+++
...............................+++
writing new private key to 'aaa_key.pem'
Enter PEM pass phrase: Oracle123
Verifying - Enter PEM pass phrase: Oracle123
-----
You are about to be asked to enter information that will be incorporated into your certificate request.
What you are about to enter is what is called a Distinguished Name or a DN.
There are quite a few fields but you can leave some blank
For some fields there will be a default value,
If you enter '.', the field will be left blank.
-----
Country Name (2 letter code) [XX]:US
State or Province Name (full name) []:St Louis
Locality Name (eg, city) [Default City]:Missouri
Organization Name (eg, company) [Default Company Ltd]:MYEXAMPLE
Organizational Unit Name (eg, section) []:OAM
Common Name (eg, your name or your server's hostname) []:oam.example.com
Email Address []:
Please enter the following 'extra' attributes to be sent with your certificate request
A challenge password []:Oracle123
An optional company name []:MYEXAMPLE
This will generate the files, aaa_key.pem and aaa_req.pem
Submit the certificate request (aaa_req.pem) to a trusted CA.
[oracle@oam webgate]$ openssl x509 -req -in aaa_req.pem -CA ../aaa_chain.pem -CAkey ../rootCA.key -CAcreateserial -out aaa_cert.pem -days 500
Signature ok
subject=/C=US/ST=St Louis/L=Missouri/O=MYEXAMPLE/OU=OAM/CN=oam.example.com
Getting CA Private Key
Encrypt the private key (aaa_key.pem) using a password as follows:
[oracle@oam webgate]$ openssl rsa -in aaa_key.pem -passin pass:Oracle123 -out aaa_key.pem -passout pass:Oracle123 -des
writing RSA key
10. Update the communication mode in the WebGate Agent registration in the OAm admin console
From the System Configuration tab, Access Manager Settings section, expand the SSO Agents node, and expand OAM Agents.
On the agent's registration page, locate the Security options and click Cert (or Simple).
Cert Mode: Enter the Agent key Password, Oracle123
11. Copy the updated WebGate files/Artifacts to the proper WebGate location
[oracle@oam config]$ pwd
/app/u01/middleware/Oracle_WT1/instances/instance5/config/OHS/ohstest/webgate/config
oracle@oam config]$ cp /app/u01/middleware/user_projects/domains/idm_domain/output/webgate5/cwallet.sso .
[oracle@oam config]$ cp /app/u01/middleware/user_projects/domains/idm_domain/output/webgate5/ObAccessClient.xml .
[oracle@oam config]$ cp /app/u01/middleware/user_projects/domains/idm_domain/output/webgate5/password.xml .
12. Copy the WebGate certificate files (.PEM) to the proper WebGate location
[oracle@oam config]$ pwd
/app/u01/middleware/Oracle_WT1/instances/instance5/config/OHS/ohstest/webgate/config
[oracle@oam config]$ cp ~/Downloads/openssl-1.0.0e/custom/webgate/aaa_cert.pem .
[oracle@oam config]$ cp ~/Downloads/openssl-1.0.0e/custom/webgate/aaa_key.pem .
[oracle@oam config]$ cp ~/Downloads/openssl-1.0.0e/custom/aaa_chain.pem .
13. Verifying Cert Mode Configuration
You must restart the Web server to instantiate the change to Cert mode. Then you can validate the results.
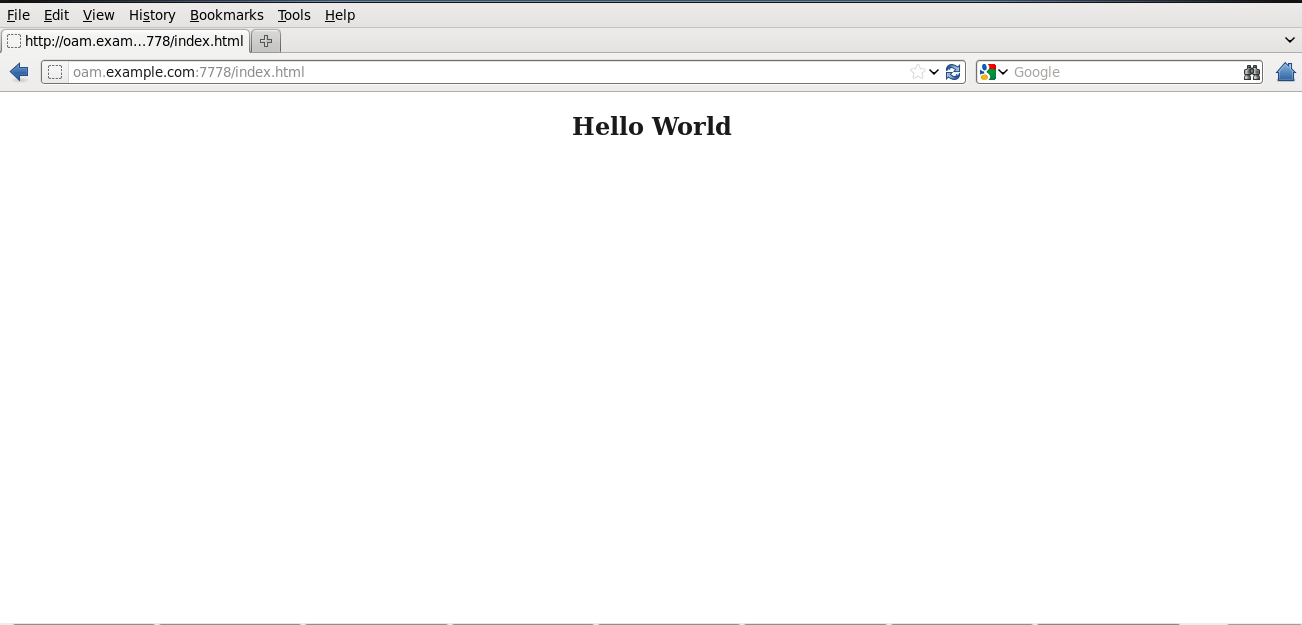
14. To validate Cert mode changes
In a browser window, enter the URL
http://oam.example.com/7778/index.html to a resource protected by the Webgate using cert mode. Issue Encountered:
while doing this configuration first time, I used the same certificate in step #3 & #9 and got different kind of errors/warnings like:
Could not read file oblog_config.xml
OBWebGate_AuthnAndAuthz: Oracle AccessGate API is not initialized.
So, second time, I configured the simple mode first to see if that works or not. After successfully configuring OAM in SIMPLE mode (found that so easy to configure) , I updated the configuration to CERT mode using different certificates in step3 & step9 though I kept the information in both certificate request as same and it worked like charm.
References:
- http://docs.oracle.com/cd/E21764_01/doc.1111/e15478/keytool.htm#autoId18
- How to Change the Communication Mode Between the WebGate and Access Server to Cert in OAM 11g (Doc ID 1384928.1)
- OAM 11g : How To Configure Cert Mode Communication For OAM 11g (Doc ID 1329738.1)